01
Getting started & the layout
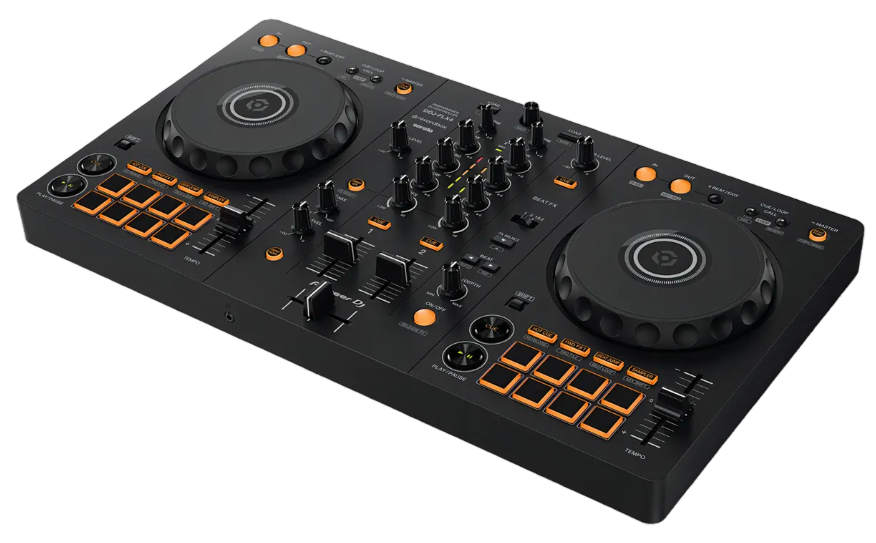
The DDJ-FLX4 is an all-in-one controller: two “decks” (one per track) on the left and right, and a mixer in the middle that blends them. It's bus-powered, so a single USB cable to your laptop both powers it and carries the audio — no separate adapter needed. It speaks two DJ apps out of the box: rekordbox and Serato DJ Lite, so install whichever you prefer.
Before your first mix, make three connections: the USB cable to your computer, your headphones to the front, and your speakers to the master output on the back. Once the app sees the FLX4 the channel meters light up — you're ready. Take a minute to find the big parts: the jog wheels, the play and cue buttons, the eight performance pads, the channel faders, and the crossfader in the middle.
02
Loading tracks & playing
Use the browse knob and load buttons to send a track from your library to a deck, then press PLAY/PAUSE to start it. The CUE button sets your starting point: with the track paused, press CUE to drop a cue where you want it to begin; while it's playing, pressing CUE jumps back to that point and pauses (a “back cue”) — perfect for restarting cleanly.
The jog wheel does two jobs. With Vinyl mode on, touching the top scratches; with it off, nudging the wheel gently speeds up or slows down the track (a “pitch bend”) so you can line two tracks up by hand. The TEMPO slider beside each deck changes the track's speed — the foundation of beatmatching, which is next.
03
Beatmatching & Beat Sync
Beatmatching means making both tracks play at the same speed with their beats locked together. Start with the TEMPO slider: move it until the incoming track's BPM matches the one already playing. Hold SHIFT and press BEAT SYNC to change the slider's range (±6%, ±10%, ±16% or WIDE) when you need finer or broader control, then use small jog-wheel nudges to push the beats into perfect alignment.
When you want help, BEAT SYNC does it automatically — it matches the tempo and beatgrid to the “master” deck (hold the button for a second to set which deck is master). Sync is great for learning and safety, but practising by ear builds the timing that makes you a real DJ. Use both.
04
The mixer: levels, EQ & filter
Each channel has a TRIM knob (its input gain) and a channel fader (its volume in the mix). Set TRIM so the channel meter peaks near the top without going red, then use the faders and the central crossfader to blend or cut between decks. The MASTER LEVEL knob sets your overall output.
The three EQ knobs — HI, MID, LOW — boost or cut those frequencies per channel; cutting the LOW on one track as you bring in another is the classic way to swap basslines cleanly. The CFX knob is a quick filter: from the centre, turn it counter-clockwise for a low-pass (muffled) or clockwise for a high-pass (thin) — a fast way to build tension. To preview the next track silently, press its headphones CUE button and balance it against the master with the HEADPHONES MIX and LEVEL knobs.
05
Performance pads: cues, loops, beat jump & sampler
The eight pads change what they do depending on the mode button above them. HOT CUE mode stores instant jump points — tap a pad to leap to that part of the track. PAD FX fires effects from the pads, BEAT JUMP moves you forward or back by a set number of beats, and SAMPLER triggers your own sounds and drops.
Loops are right there too. Press IN then OUT to set a manual loop, or hit 4 BEAT to instantly loop the next four beats (press 4 BEAT/EXIT again to release it). The CUE/LOOP CALL arrows recall saved cues and loops, and during a loop they halve or double its length — great for building energy before a drop.
06
Effects: Beat FX, Smart CFX & Smart Fader
The Beat FX section adds tempo-synced effects to a channel. Use BEAT FX CH SELECT to choose which channel it hits, BEAT FX SELECT to pick the effect, and the BEAT ◄ / ► buttons to set how many beats it syncs to. The LEVEL/DEPTH knob controls how strong it is, and BEAT FX ON/OFF turns it on — hold SHIFT for a Release FX that smooths your way out of the effect.
Two “Smart” features make beginners sound clean: SMART CFX applies a tasteful filter sweep with one button, and SMART FADER auto-blends tempo and EQ as you move the crossfader, keeping your transitions beatmatched while you learn. Lean on them early, then peel them back as your hands take over.